SpatialFlow for Managers
This guide covers the dashboard only. If you can use a web browser, you can set up SpatialFlow for your team. No API keys, no code.
Screenshots reflect the product on 2026-09-03; the UI may have changed. Regenerate
them with node documentation-site/scripts/capture-guide-screenshots.mjs.
- A work email address
- Your team's names and emails (or a way to print QR codes for check-in)
- 15-20 minutes
Create your workspace
Go to the sign-up page and fill in your name, your company name, your email, and a password. Your company name becomes your workspace name — the shared space everyone on your team joins. You become the workspace Owner automatically.
SpatialFlow seeds your new workspace with one example geofence, one example device, and one example workflow, so the dashboard isn't empty on your first visit. You can edit or delete these once you've found your way around.
Invite your team
Go to Settings > Workspace. The Team Members section has an Invite Member button (visible to Owners and Managers).
You can paste one email or several, separated by commas or new lines, and send them all at once. Pick a role for the batch:
- Owner — full control, including billing and workspace settings. Only an existing Owner can send Owner invitations; a Manager who picks this role gets a refusal.
- Manager — can manage members and view the audit log, in addition to everything a Member can do.
- Member — this is the role field workers get. They can view workspace
resources and share their location from the mobile app. (Internally this role is
called
field_worker; it shows as "Member" everywhere in the dashboard.)
Email invites, QR codes, and the print sheet
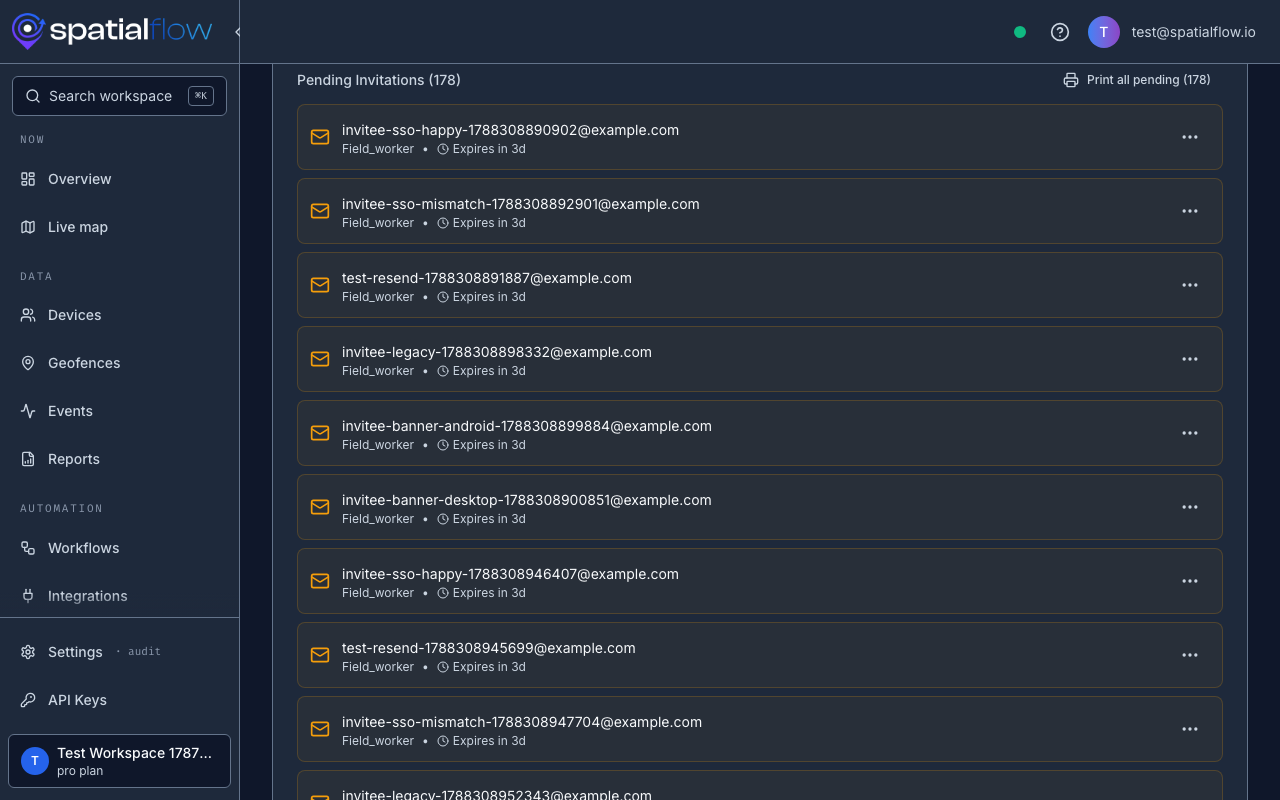
Each invitation is sent by email and also works as a scannable QR code — useful for handing out at a check-in table without anyone typing an email on a phone. On a pending invitation, open the ⋮ menu:
- Show QR — a code for that one invitation, with the workspace name, role, and expiry printed under it.
- Resend invitation email — mints a fresh link and resets the expiry.
- Extend expiry — pushes the expiry out without resending.
- Revoke invitation — the link stops working immediately.
For a crew, use Print all pending above the list to print one card per pending invitation, several to a page — hand them out and let people scan with their phone camera.
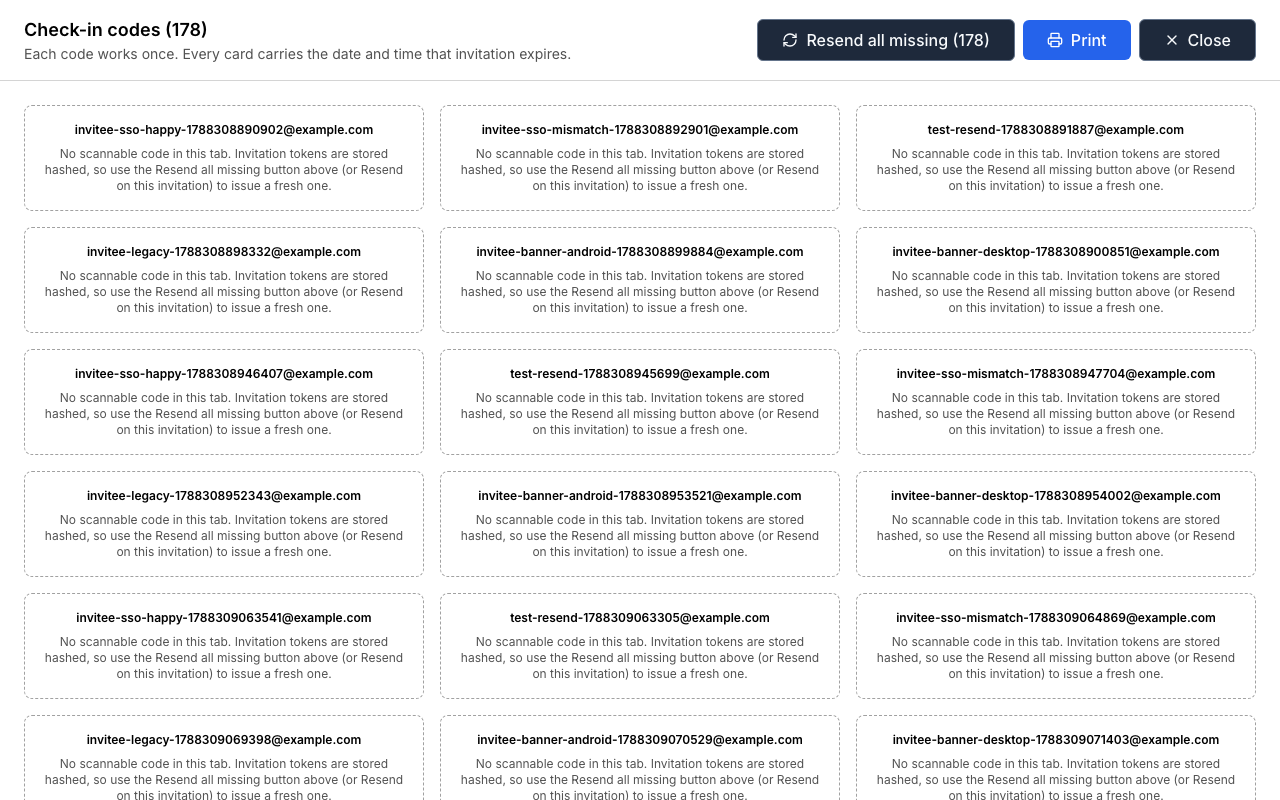
One catch: a scannable link only exists in the browser tab that sent or resent it (the token is stored hashed on the server). Come back later and each card shows "No scannable code in this tab" instead of a QR — the screenshot below shows that state, with a Resend all missing button to fix it. Resends are limited to 10 per hour per person, so on a big sheet the button reissues what the budget allows and stops; wait an hour and run it again for the rest.
What the invitee sees
They get an email with a link, or scan the QR code, which opens the SpatialFlow app (installing it first if needed). They see your workspace name and their role, then set a password or sign in if they already have an account. See SpatialFlow for Field Workers for their side of this.
Add your first geofence
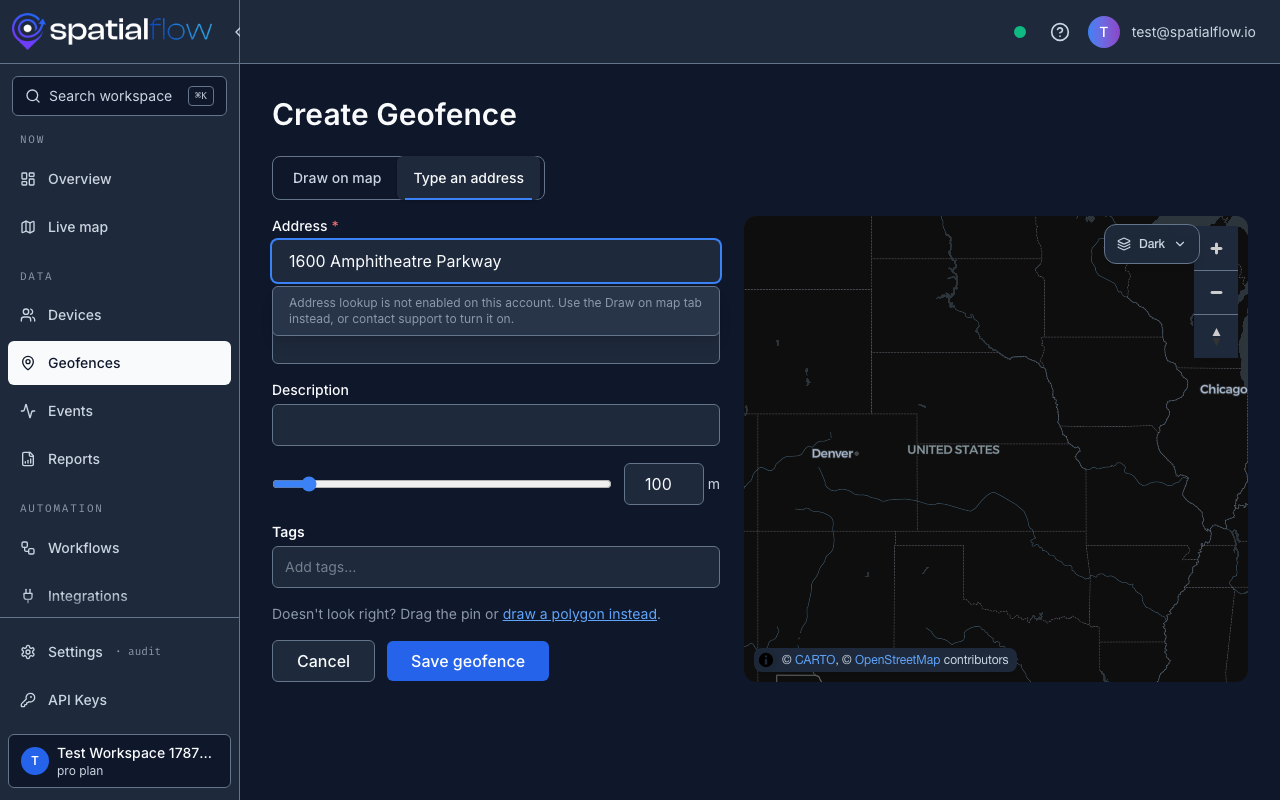
Go to Geofences > New. You get two tabs:
- Draw on map — draw a polygon by clicking points, or switch to circle mode and drag a radius.
- Type an address — search for an address, drop a pin, and set a buffer radius (10-1,000 m) around it.
If your team works in one general area, open the live map, pan and zoom to that area, and use Set current view as workspace home (also available under Settings > Workspace > Map Home Area). New maps across the dashboard will open there instead of a default world view.
The live map
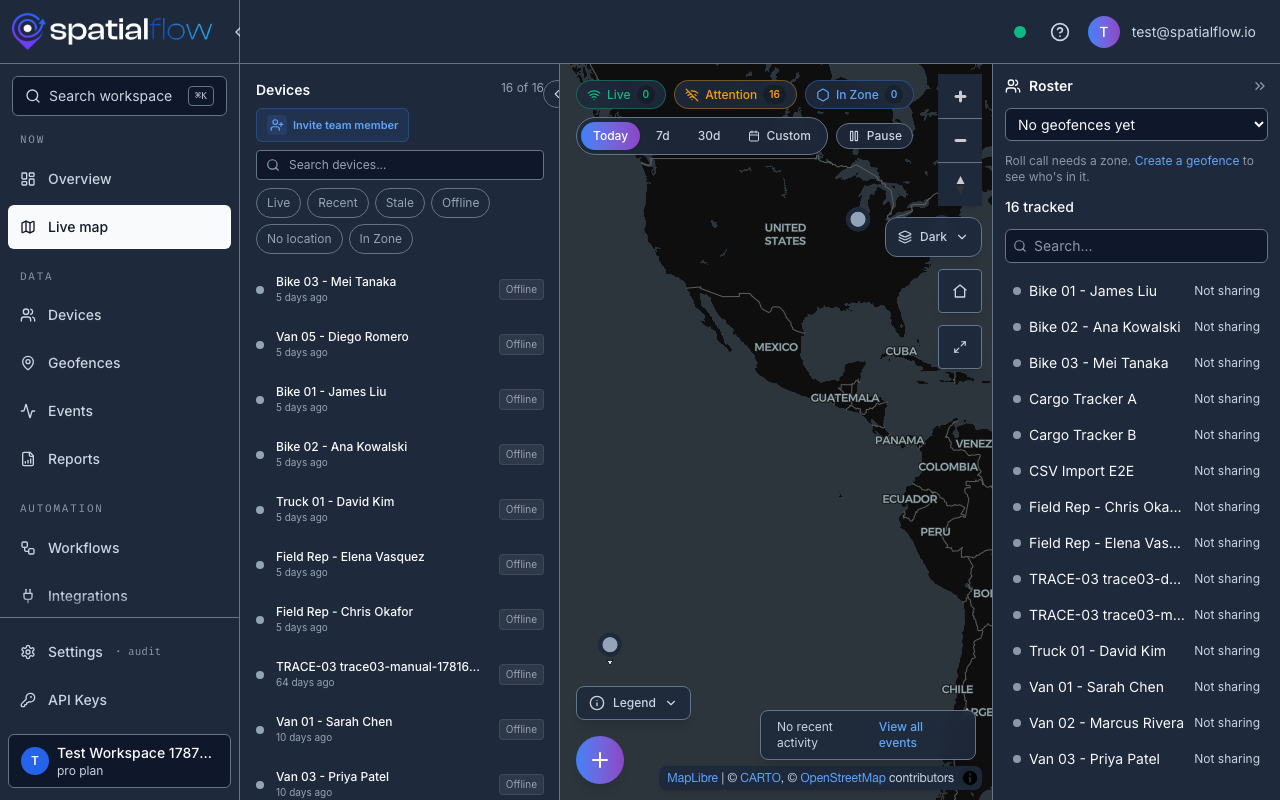
The Live Map (/live) shows every device on a map in real time, plus a device
list on the left with search and status filters, and a roster panel on the right for
roll call against a specific geofence.
Roster (roll call)
Pick a geofence from the roster panel's dropdown (it prompts you to create one first if your workspace doesn't have any yet). Each person shows as:
- In
<geofence name>(green) — reporting location and inside the zone. - Outside (red) — reporting, but not inside the zone.
- Not sharing (grey) — no location update in the last 15 minutes, whatever their last known position was. A stale position never counts as "in zone" — that's the point of roll call.
Filters and freshness badges
The device list filters by status — Live, Recent, Stale, Offline, No location — plus a toggle for "in a geofence only." The badges track how long ago a device last reported:
- Live — within the last 2 minutes.
- Recent — within the last 10 minutes.
- Stale — within the last 60 minutes.
- Offline — longer than that.
- No location — the device has never reported a position. Use this filter, not Offline, to find phones that were set up but never started a shift.
A small arrow on a device's dot on the map shows which way they're heading, when their phone reports it.
Set up an alert
Go to Workflows, click Create Workflow, then Start with a template. The gallery offers ready-made recipes such as Fleet Arrival Alert, Delivery Alert, and Zone Monitor — each one already wired to a geofence trigger and a notification action, so you're editing, not building from scratch.
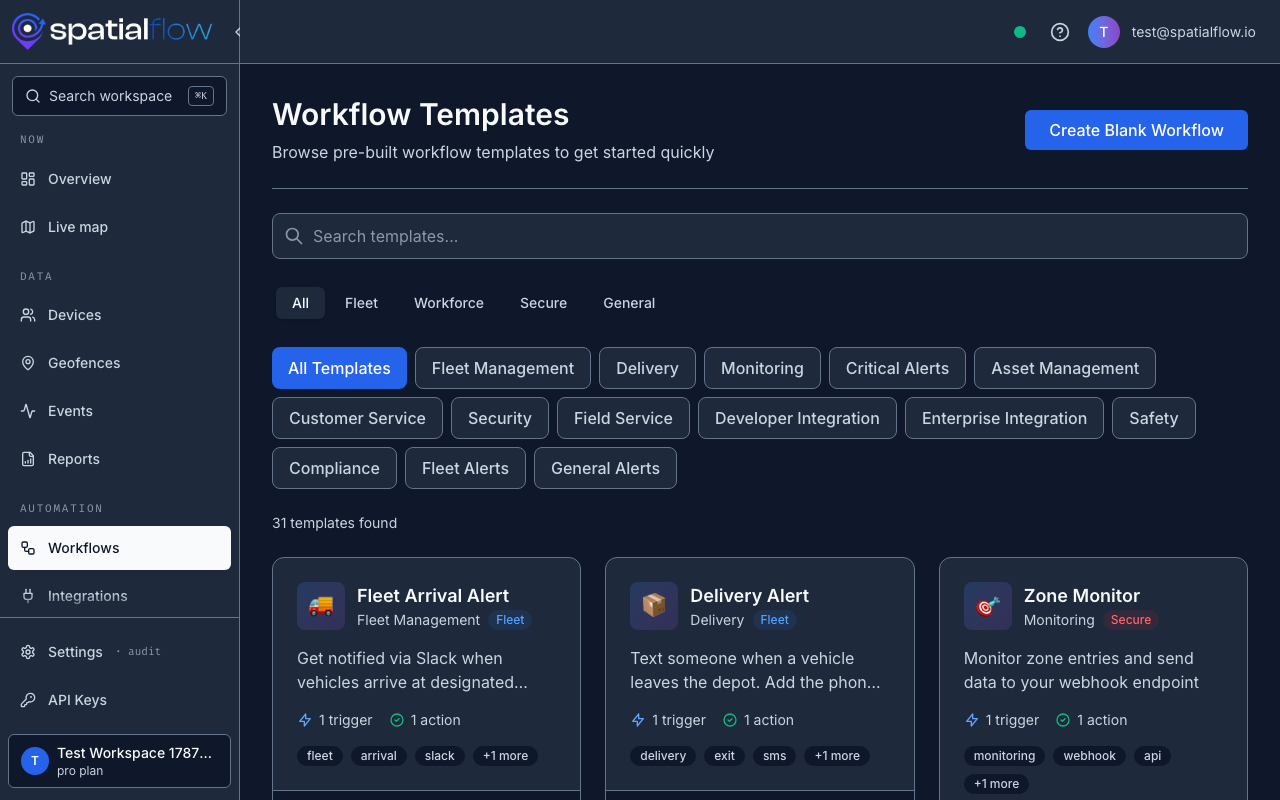
Pick one and it opens in the builder. Click the trigger node to see its settings: a geofence trigger lets you choose Entry, Exit, or Entry or Exit, and which geofence(s) it watches.
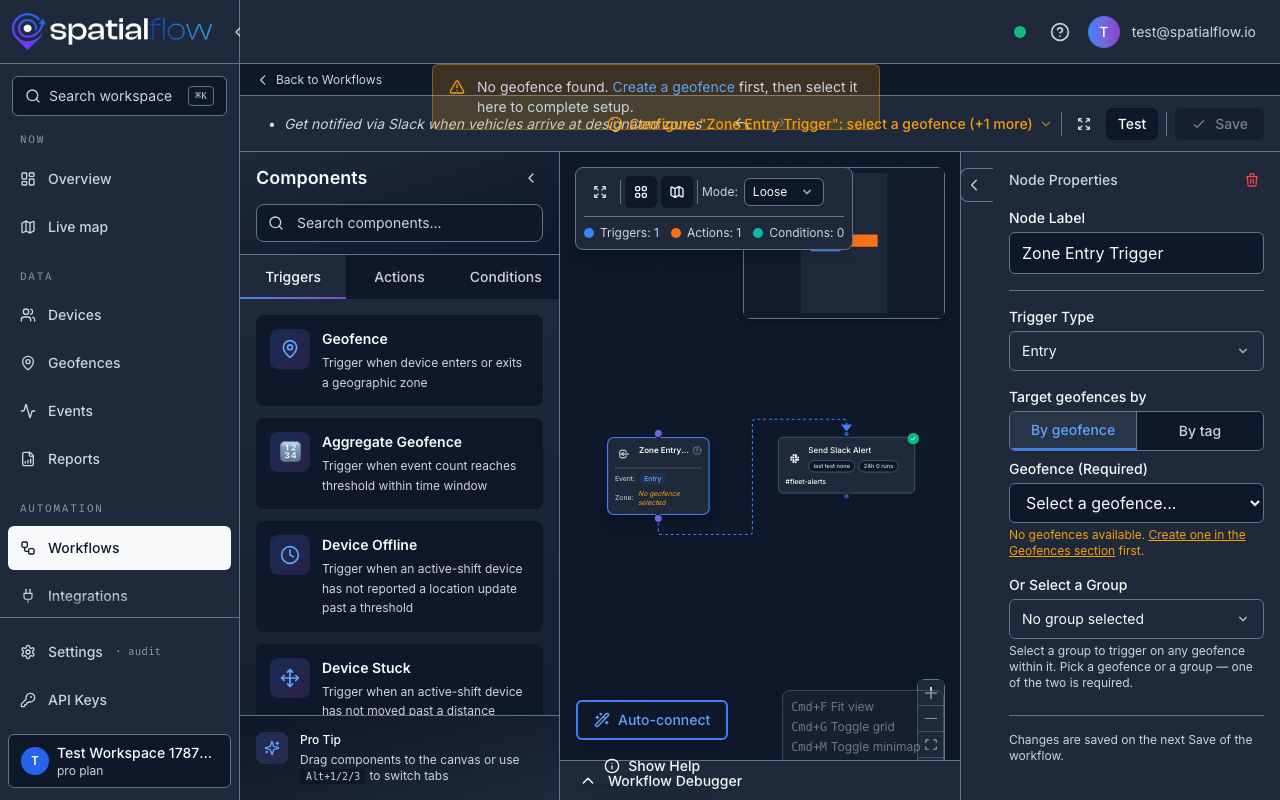
From there, add a notification action:
- Send Email
- Send SMS
- Slack (connect a Slack integration first, under Integrations, then it appears as an action you can drop onto the canvas)
Save and turn the workflow on. It fires the next time a device crosses that geofence.
There's no way today to alert on current headcount in a zone (for example, "tell me if fewer than 3 people are checked in by 8am"). Workflows react to individual entry/exit events, not a live count against a target. If that's what you need, the roster panel above is your best manual substitute for now.
Attendance and reports
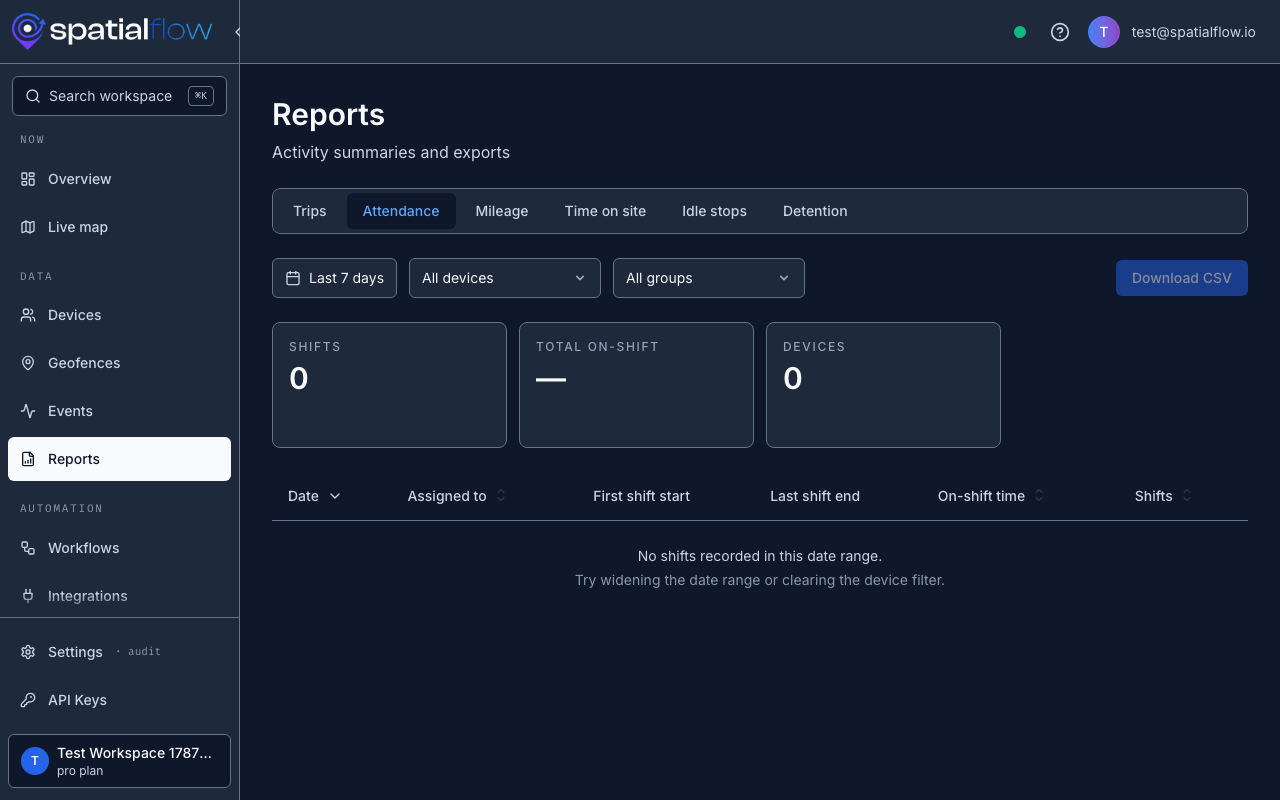
Go to Reports. Six report types are available: Trips, Attendance, Mileage, Time on site, Idle stops, and Detention. Attendance is built from shifts: when each worker started and ended a shift in the app and how long they were on shift. It does not check whether they were inside a geofence; use Time on site for presence at a worksite. Filter by device, group, and date range, then export.
What a field worker does on their phone
Inviting someone is half the job — they still need to install the app, accept the invite, and start a shift before they show up on your live map. Send them SpatialFlow for Field Workers for the rest.
Plan limits and usage
Every plan caps active devices:
| Plan | Devices |
|---|---|
| Free | 5 |
| Pro | 25 |
| Business | 100 |
| Enterprise | Unlimited |
Invitations are rate-limited per person sending them, not per workspace: up to 100 new invitations an hour, up to 10 resends an hour. One big bulk invite is fine; doing it twice in the same hour may not be.
Check current usage under Settings > Usage — devices, geofences, webhooks, and events against your plan's limits, with a CSV export.